Table of contents
Email signatures in the digital environment have the same role as paper business cards during offline meetings. In this article, we’ll explore ways of setting up a footer on your Gmail account and keeping the design consistent across the whole organisation.
Why do you need an email signature?
Email signatures might seem very optional at first. On a list of new messages in a recipient’s mailbox, your emails are signed with the name included in your account or directly in your email address. Plus, we’re all used to manually typing some variation of ‘best regards’ and a signature at the bottom of emails.
Why have professional footers become a standard in business email etiquette? Here are a few reasons why an automatic email signature might be better than a hand-typed one:
- An email signature often includes more information about the sender than just a name. It’s a quick way to inform a receiver about the organisation you represent and your position within it. You can also add other contact channels like phone numbers or chat, as well as links to websites and social media profiles. Thanks to it, you can skip extended introductions in the email’s body to write clear and concise messages.
- It saves you a lot of time if you send emails often. You could type all your contact info each time under a message in a matter of seconds, but these seconds quickly add up to hours in a month.
- It reinforces the brand image. When you’re writing business emails on behalf of a company, it’s always a good idea to have a signature with a logo and website. That way, the recipient is exposed to your brand’s visual identity each time they receive a message from you.
How to set email signatures in Gmail?
To access all the options related to signatures in Gmail, click the gear icon in the top right corner to open Quick settings, then click a See all settings button and scroll down in the General Settings tab until you see a section titled Signature. It looks like this:
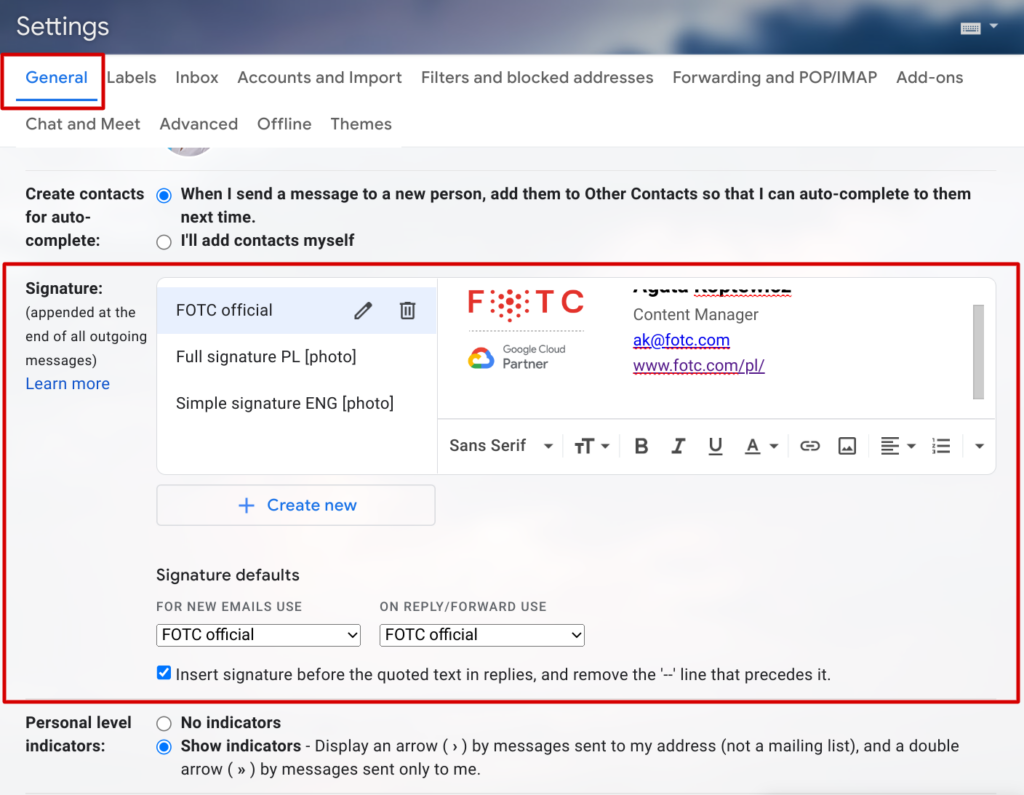
Here you can create signatures and decide how to display them in messages.
When it comes to creating the content of signatures, there are a few possible approaches:
- You can type contents by hand in the text box in Gmail settings. There are a few options for adding style and images, but they are very limited.
- You can prepare your signature in a Google Docs file and copy and paste it to Gmail. To ensure it looks exactly how you planned it, create the layout of text and images in a grid table with white borders.
- You can design an HTML signature and paste the code into Gmail to give your footer a fully customised look.
Can I have more than one Gmail signature?
You can use a few signatures tailored to different occasions and audiences. Set a default signature for new emails you compose or reply to, and then add alternatives you can manually choose with each message you send. Remember to name each footer.
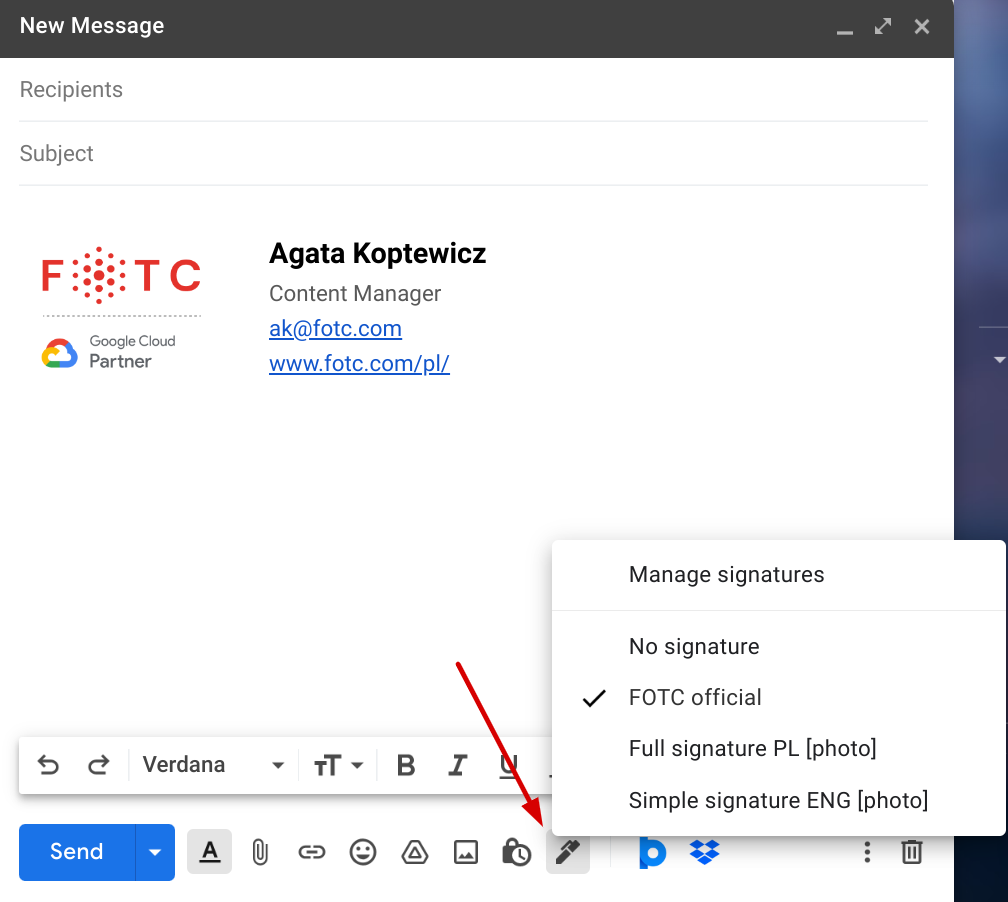
A pen icon at the bottom of the email creation window lets you pick one of your saved signatures.
Now that you know how to set up your signature in Gmail, it’s time to find out how to plan this process for the whole organisation. FOTC provides its clients with a tool designed directly for this purpose.
How to use Gmail Signature Manager?
In business correspondence, it’s crucial to keep formal email signatures consistent with the organisation’s corporate identity. Gmail Signature Manager will help you enforce the design and content guidelines in footers on accounts of all the employees at once.
This custom API-based application developed by FOTC allows you to set dynamic conditions for creating footers for the entire organisation in a few minutes.
After authorising Gmail Signature Manager to make changes in your Google Admin console, log in to the app with a Google Workspace Super Administrator account.
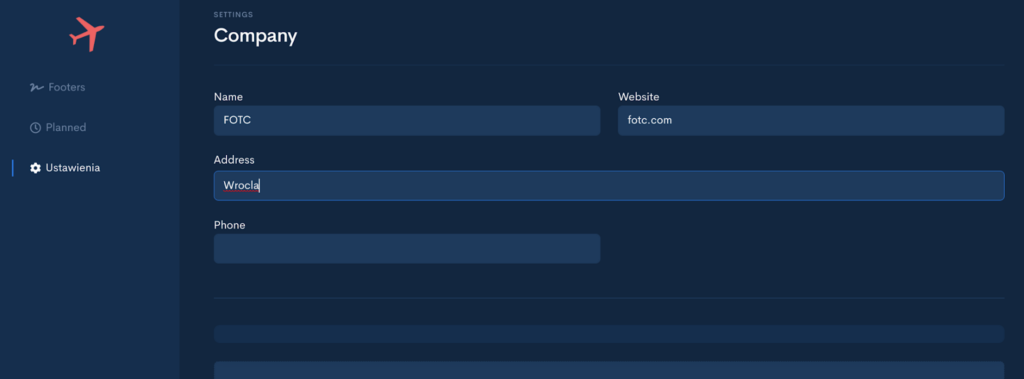
To begin with, go to Settings and enter company information:
- Name of the organisation
- Website
- Address
- Phone
- Photo or picture with company logo
Then go to the Footers tab and click the New footer button in the top right corner to create your first project – it can be universal for all employees or customised for a specific department. You can configure a few different templates this way.
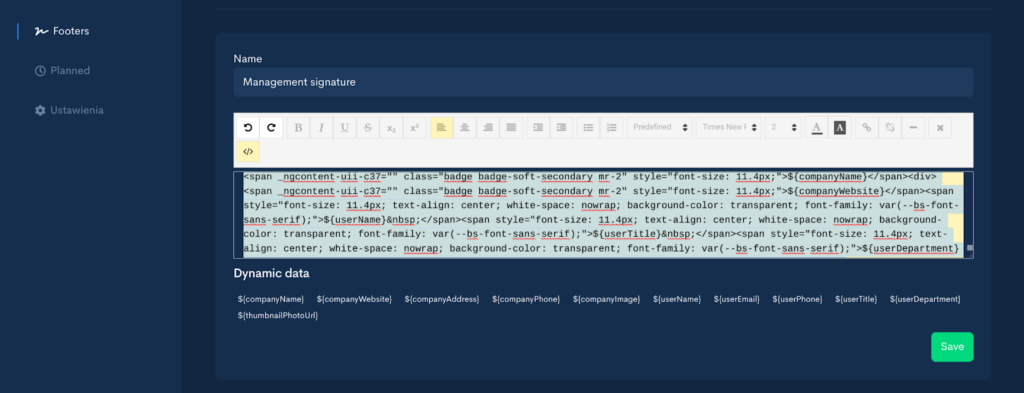
In the text box, insert variables that pull personalised data from the settings tab and Google Workspace user profiles. Use an HTML editor or regular text editor to format the contents. You can save templates for future use.
To make your signature appear in employees’ mailboxes, go to your list of saved templates (under Footers) and click Details next to the one you want to implement. Here you can see a preview of the footer, and choose to:
- Equip all email accounts in the company with this signature by clicking Set for all in the top right corner;
- Set the footer for a single address or its alias;
- Pick an organisational unit or a mail group that will be provided with this signature.
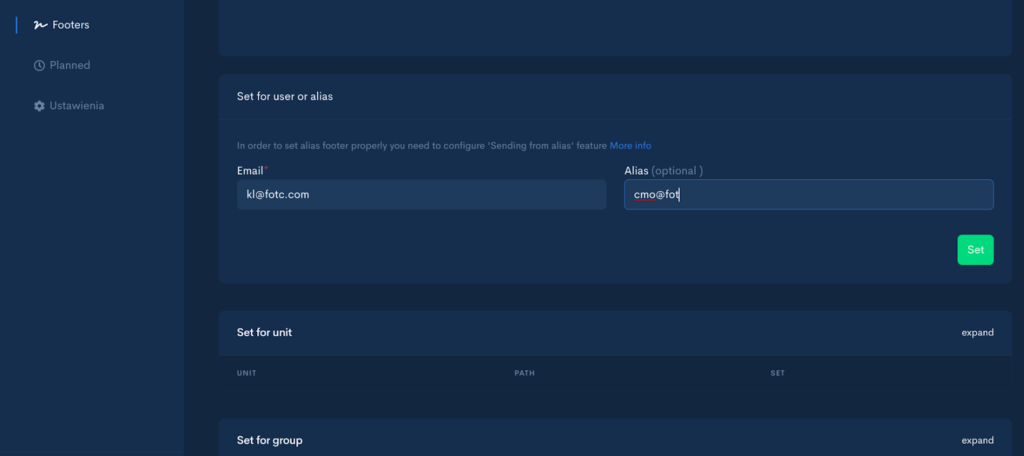
That’s it! Your chosen group of Gmail accounts will gain a professional signature consistent with the company’s branding. Users can also modify their signatures in their mailbox settings.
If you’re interested to know more about how to fully utilise Google Workspace tools in your company, contact FOTC and sign up for our Google Workspace newsletter.
