Kubernetes on Google Cloud – tutorial
In this article you will learn the basics of Kubernetes cluster orchestration system on Google Cloud. In a few simple steps we will walk you through creating a project, including setting the region, creating a cluster and deploying an application to it. Let’s get started.
The first step is to access the Google Cloud Console: https://console.cloud.google.com/.
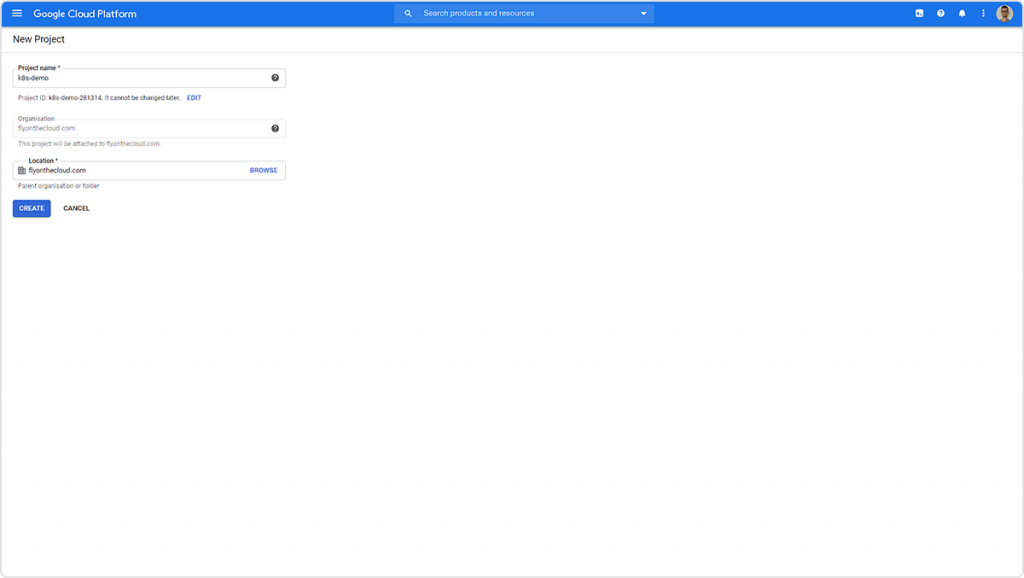
Create a project
Create a new project (click on the project name next to “Google Cloud” in the top left corner).

Enter the project name and click Create.
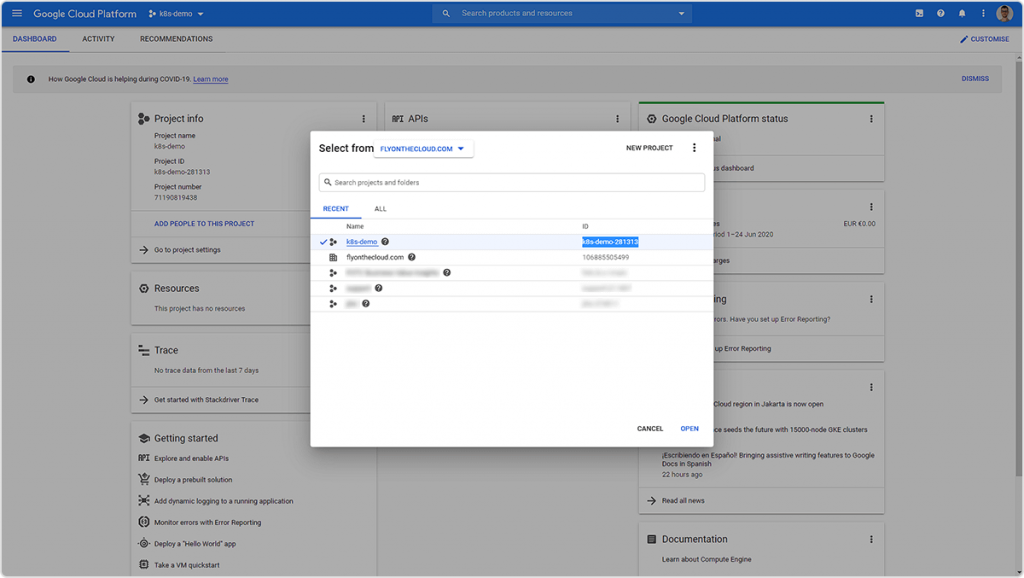
To view the list of projects again (button next to “Google Cloud”), you will obtain the project ID. You will need it for the following steps.
Cloud Shell
Open Cloud Shell (top right corner).

Use the following command to set the project you will be working on:
gcloud config set project k8s-demo-281313
Note that in the command, you should enter your own project ID, which may differ from the example provided.

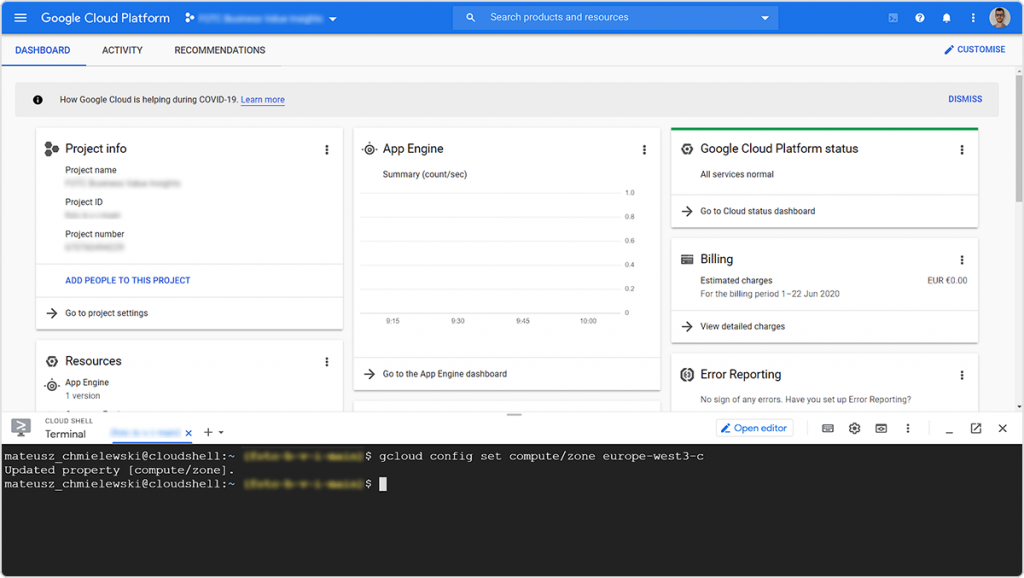
Set the region
Next, set the region where you want to deploy the application:
gcloud config set compute/zone europe-west3-c
Check Google Cloud list of regions.
Create a cluster
Create a cluster using the command:
gcloud container clusters create my-cluster--num-nodes=1
The –num-nodes flag allows you to specify the number of nodes (physical or virtual machines) in the cluster. Read more about the flag.
This operation may take a few minutes.
After the operation is completed, you will receive a table in Cloudshell that shows the cluster parameters.

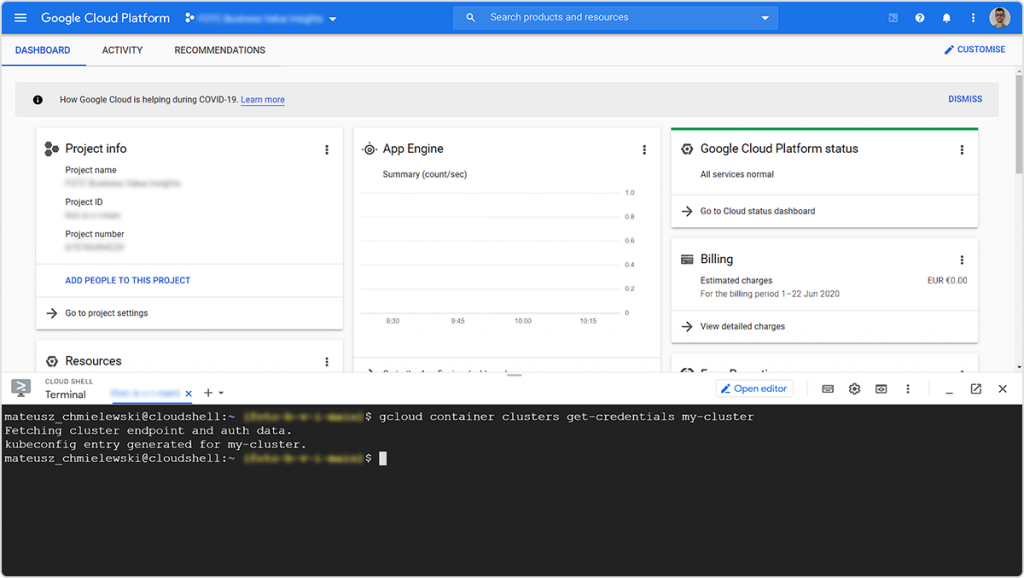
Now use the command:
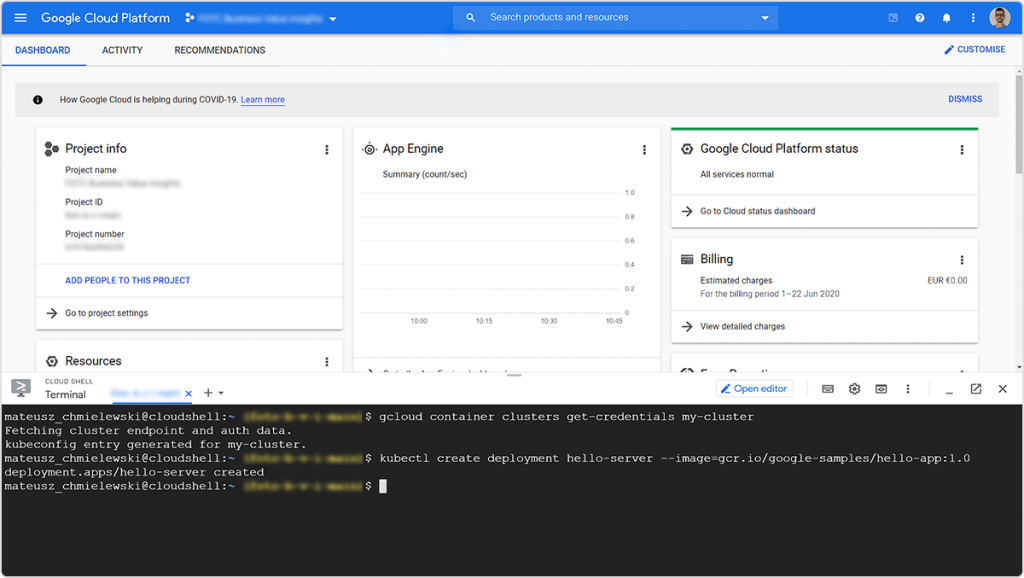
gcloud container clusters get-credentials my-cluster
This command updates the kubeconfig file with the appropriate references and information for further work with the cluster.
Deploy your app to the cluster
To deploy an application to the cluster, use the following command:
kubectl create deployment hello-server --image=gcr.io/google-samples/hello-app:1.0
The –image flag indicates the link to the containerized application in the Container Registry (GCR). The Container Registry service allows you to store containerized application images. Read more about the GCR feature.
Here is the source code of the hello-app we are deploying.
You can deploy your application by specifying the containerized image from the Container Registry.
Expose the app
Now you need to expose the application. For this purpose, use the command:
kubectl expose deployment hello-server --type LoadBalancer \
--port 80 --target-port 8080
You can read more about the “kubectl” command.
The flag
--type
indicates the type of deployment (ClusterIP, NodePort, LoadBalancer, or ExternalName). In this case, we are creating a LoadBalancer, which will make the application accessible over the internet.
The flag:
--port
indicates specifies the port on which the application will be served.
The flag:
--target-port
specifies the port in the container to which the service should direct traffic.
Next, enter the command:
kubectl get service hello-server
This will provide you with the public IP of the cluster where you deployed the application.
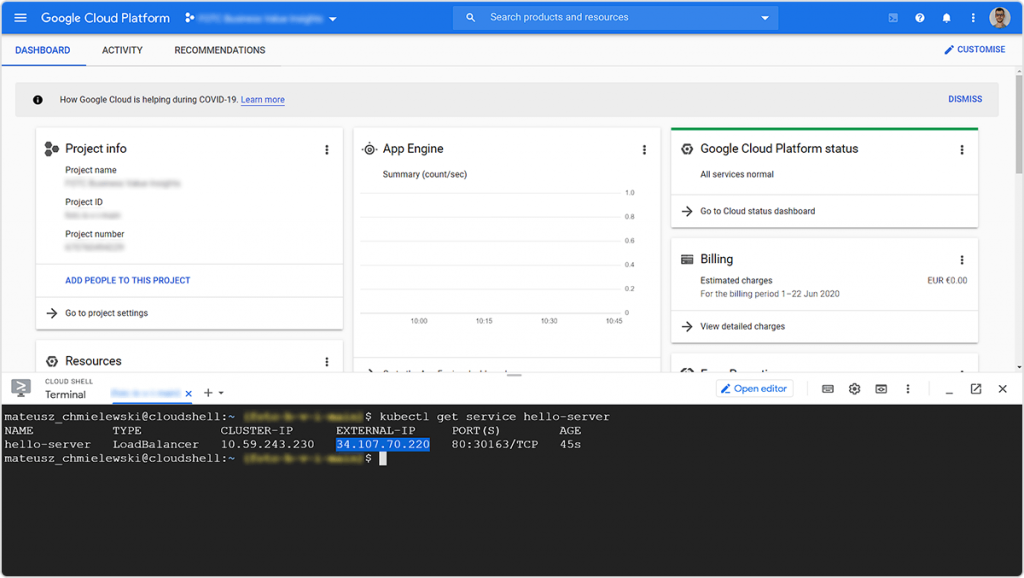
Here is the result:

Remove the cluster
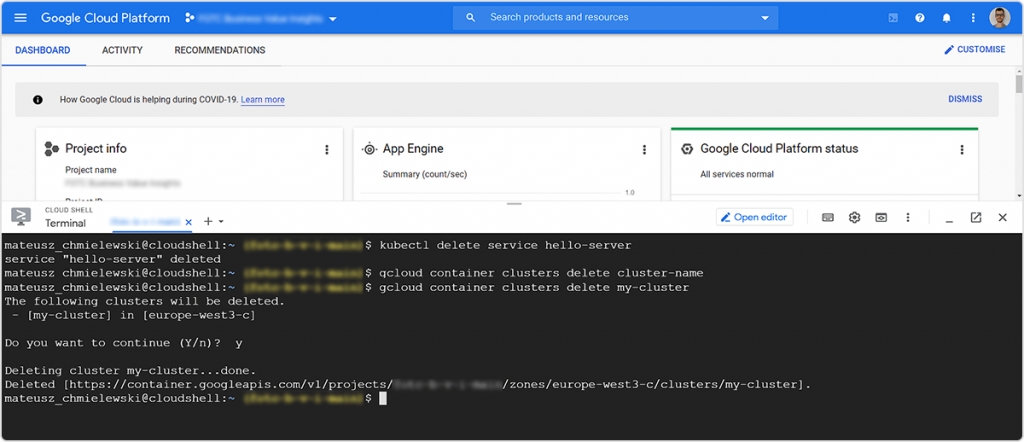
To remove the cluster and undo the deployment, use the commands:
kubectl delete service hello-server
gcloud container clusters delete my-cluster
And that’s all for Kubernetes 101! Hope you enjoyed creating your first cluster and deploying your app into it. Good luck!